Hello all.
So I am a beginner cyclist, been at it only for around 6 months after an almost 20 year hiatus due to equilibrium issues. Because I wasn't sure if i'd be able to keep up with riding, I bought a dirt cheap bike off amazon, the Giordano rs700. Well even after a snowy winter by Vancouver standards, I made it through with only 1 broken rib and am loving the freedom cycling gives.
I originally started cycling to cut down on the lost time between bus connections, one issue was when I worked afternoon shifts, i'd get off work at 11 pm and i'd be stuck carrying a large bike unto a shuttle bus for the journey up to my house on a mountain. So I figured it was time to give electric a chance.
due to my size, many complete bikes wont work for that climb, so I explored conversion kits as an option. I decided on the Magic Pie edge as the kit of choice, it seemed to be the most powerful legal option available. So I put in an order to Gary, and an order for a 10AH 52V Panasonic GA cell battery (NCR chemistry) from lunacycle. They both arrived fairly quickly and within a day of eachother, plus on my first day of my 3 day weekend, so a perfect scenario to do the conversion.
So I took off my rear wheel, removed its tire (bontrager h5 hardcase with a tough strip) and installed it on the new tire. Thankfully it went on easy.
My next step was to install the freewheel. I had a pretty new one on my old tire, as I snapped an axle in february and the old one was worn to crap, but I did not want to buy the removal tool for it.
So I picked a new one up and installed it.
Next step was placing the motor in the drop outs, it was really tight, I ended up having to coax the axle on with a few whacks. I had a bit of a clearance issue with the rear derailleur so I had to remove the nut to clear the body of it, and then rethread the nut on. Also needed to spread the drop out a hair to get the axle alligned properly. After all this struggle, I go to tune the derailleur and I find that its rubbing against the body when I try to enter the lowest gear. So I go look into documentation online to see what I did wrong. Apparently I did not install a spacer, nor did I see one when I unpacked the kit, so I went through the packaging all over again and found it.
Now if you remember, I said I bought a new freewheel because I did not have the tool to remove a freewheel, so now I was in a predicament. Thankfully youtube came to the rescue and I found out that some spark plug sockets can remove freewheels easily. Had one that worked from left over tools from my father. So I had to wrestle the wheel back in the drop out, and continue on with the build. I still noticed that my lowest gear would cause a derailer screw head to slightly drag on the motor, but atleast it would switch all the way over. This may be a bent hanger mount thingy (very technical term) due to a previous lost derailler getting sucked into the spokes when I was too lazy to properly retune it. The LBS mechanic managed to work some magic on the hanger since it was over a week away to order a new one in. So I just set the limits to not enter that gear.
Now comes the brake/shifter issue. Cheap bike came with cheap bottom of the the line tourney combo brake/shifters. Needed to replace these to get the new brakes on. unfortunatly the ones I bought interfered with the throttle handle wiring, so I had to really fine tune where I fit the levers, but it really made it difficult to shift gears. Thankfully I broke my throttle (talk about it in another thread), so when I put the old handles back on, I was able to fix their locations and clean up the handle bars a bit.
Now the biggest issue with these DiY kits. Wire mess. I got to hand it to GM, their harness really makes it clean, but it still leaves a lot of excess wire around the handlebars. It would have been nice if it came with a pouch to hide around the headset. This will be a problem I fix one day, and it will be one that bugs me until I do. Being an electrician who's skillset is mostly PLCs, VFDs and various industrial applications, messy wiring really pisses me off. One of the chances I ended up making after I tied in all the cables, was removing a brake line and sleeving the rear brake in brake housing so I could tie wrap around the housing vs the tube.
So thank you to those who kept up with my wall of text, now i'll give some photos
The Battery and charger from Lunacycle (GM canada was out of stock):

They both fit perfectly in my trunk bag:

The mounted wheel with the cables tied in place (With a drip loop)

Heres the display and harness cable tied to the brake housing:

the excess wiring as neat as I could get it

decluttered handlebars once I removed the throttle


and finally the full view of the bike:
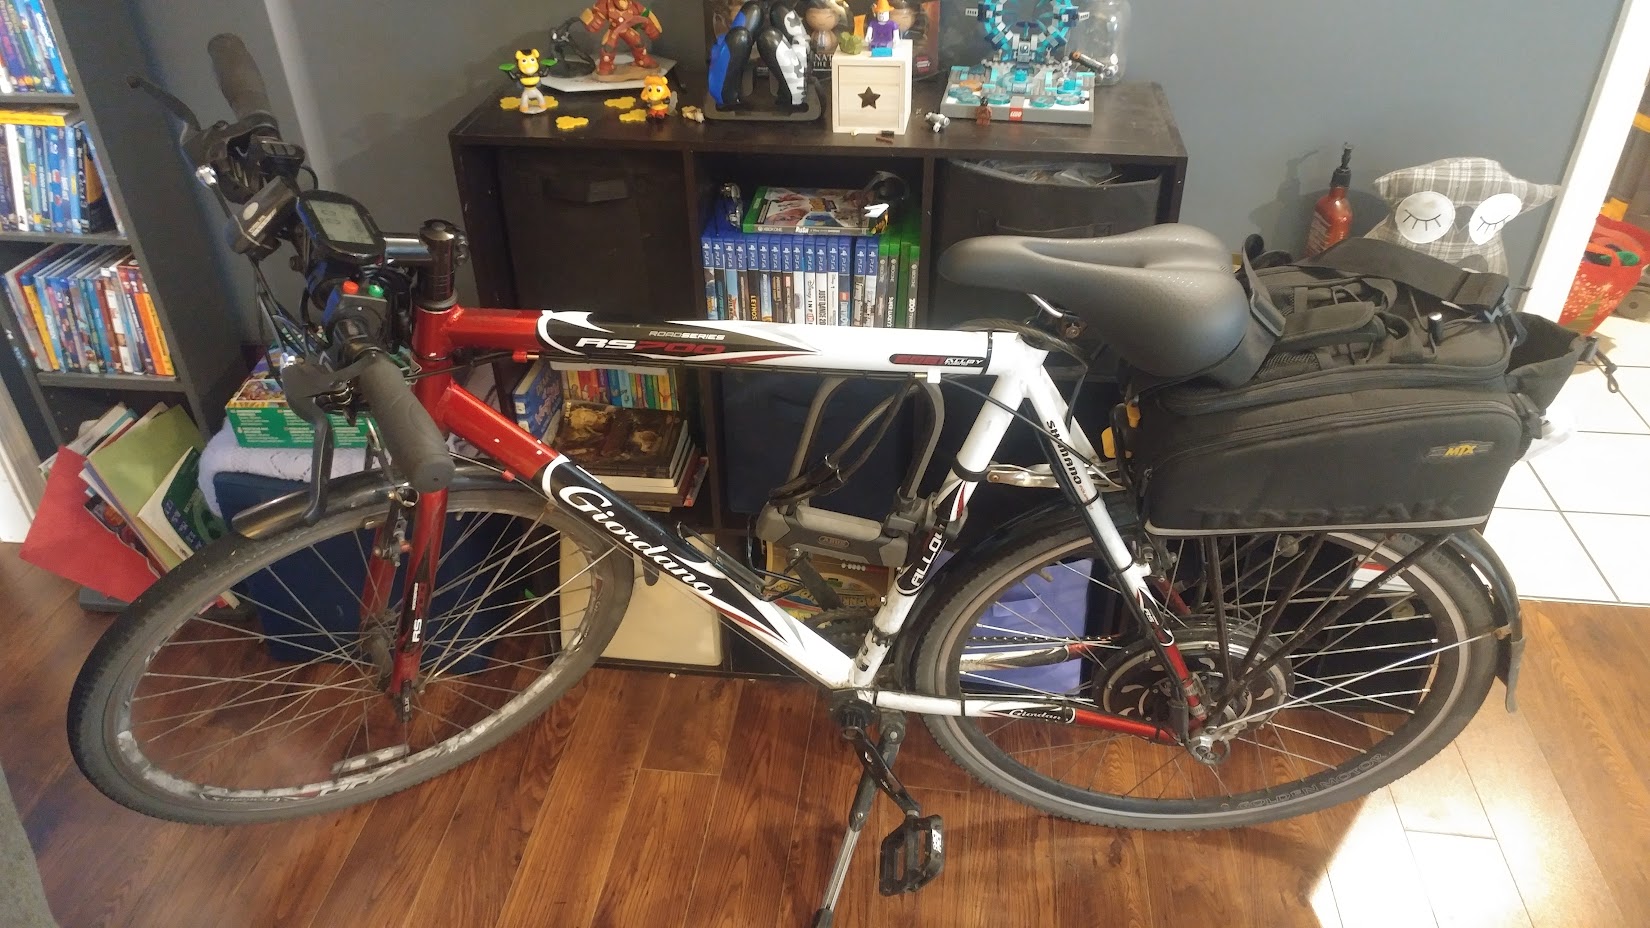
One of my goals with the bike was to make it a more discrete ebike, as I am using transit with it, and no motor assisted bikes allowed on bus racks regardless of weight. The racks take 50lb per bike, this bike weighs 49 lbs without the pannier on, which I got to remove anyways. my excuse is without the battery, its not motor assisted

worst case I just go on the sky train with it as its only a slight detour with an extra few km.
I did have a few noise issues. first one was clanging, this was spokes that loosened off, I had to tighten quite a bit. second noise was a swishing every rotation. This was caused after tightening all the spokes throwing the rim out of true and rubbing on the brake pad, went away quickly thankfully. then.... there was creaking, this was solved by lubricating each spoke hole in the rim.
So with me being 300lb I put this kit through some abuse. After over 4 km of straight incline, the motor still doesn't kick out. I've only put it in thermal overload once by trying to take a shorter much more steep climb, which I expected to trip out a lot sooner than it did. Plus its rainy season (big surprise in vancouver) so its functioned fine through a couple really bad downpours. Overall im really happy with the Kit Gary provides, and his documentation is superb once you figure out which ones apply to the Edge.


