I would have posted the review sooner, but I couldn't decide whether to just post a review on the motor, or simply write about the installation side of it, so I've tried and cover both aspects within this one post instead.
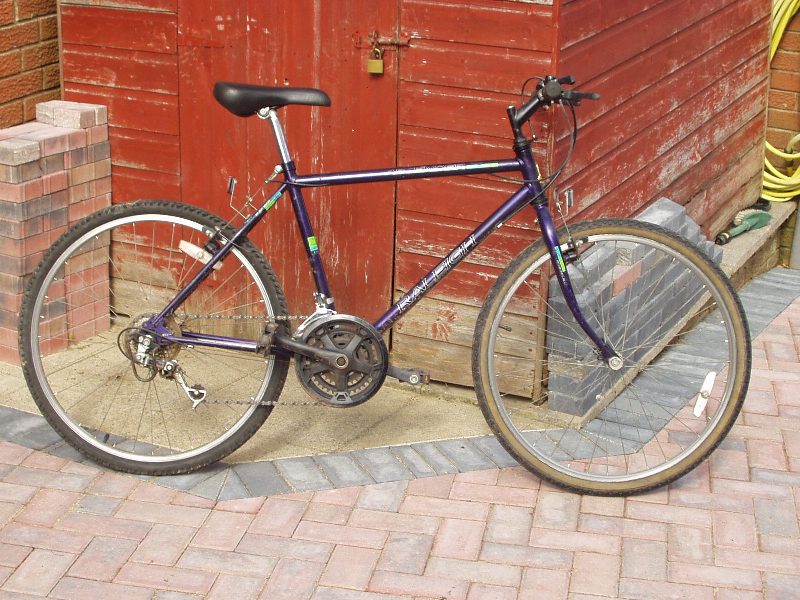
The Smart Pie 26" Rear kit had finally found its way to my house, and I was very anxious to try it out, so I decided to quickly install it on one of my rarely used bikes, an old steel framed Raleigh Ascender 15 Speed Mountain bike:
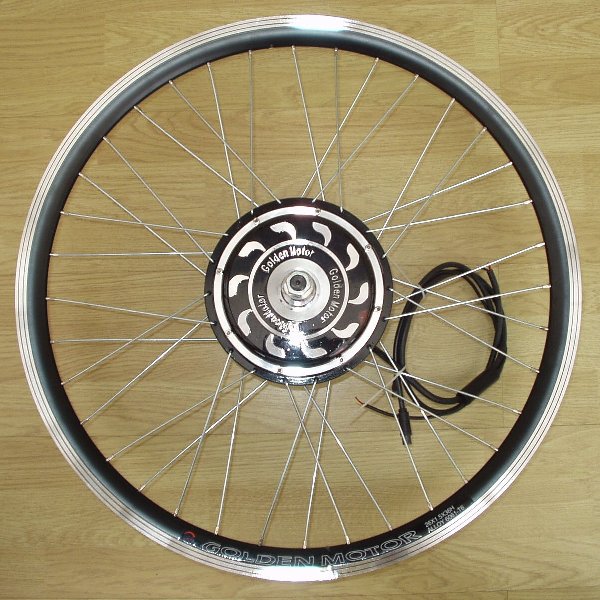
I quickly removed the wheel from its packaging to take a good look at it, and I must say that I was very impressed with its appearance, I guess GM must have decided to rename it "Smart Pie" instead of "Mini Pie" simply because it looks so very smart:
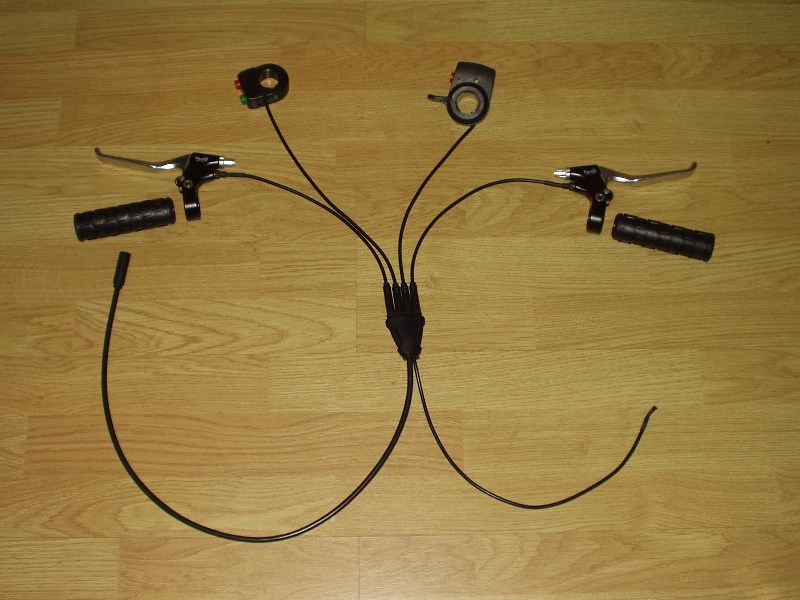
Unfortunately, I was so keen to get the motor fitted that I forgot to take any pictures of the controls supplied with the kit before assembly, so here's a photo of the MPIII controls instead. They are basically the same, except I'm using a twist throttle and the connector harness junction unit now has numbers marked on it:
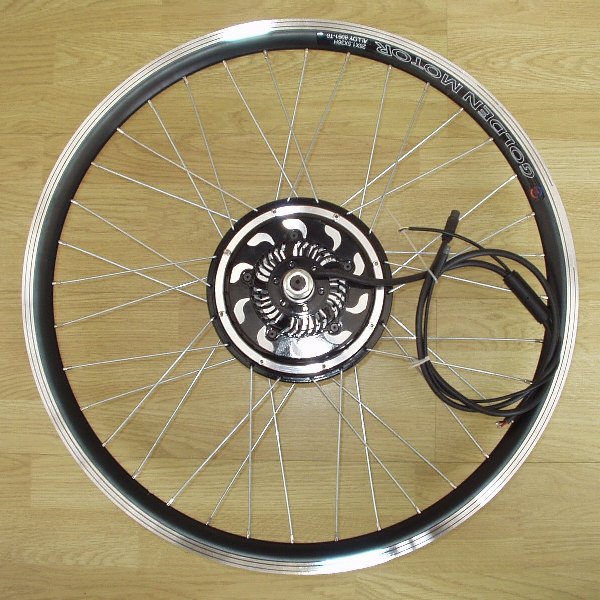
I decided to do a quick size comparison between the Smart Pie and the Magic Pie, so here are a couple of pictures demonstrating the significant difference in size between my old original Magic Pie and the new Smart Pie:
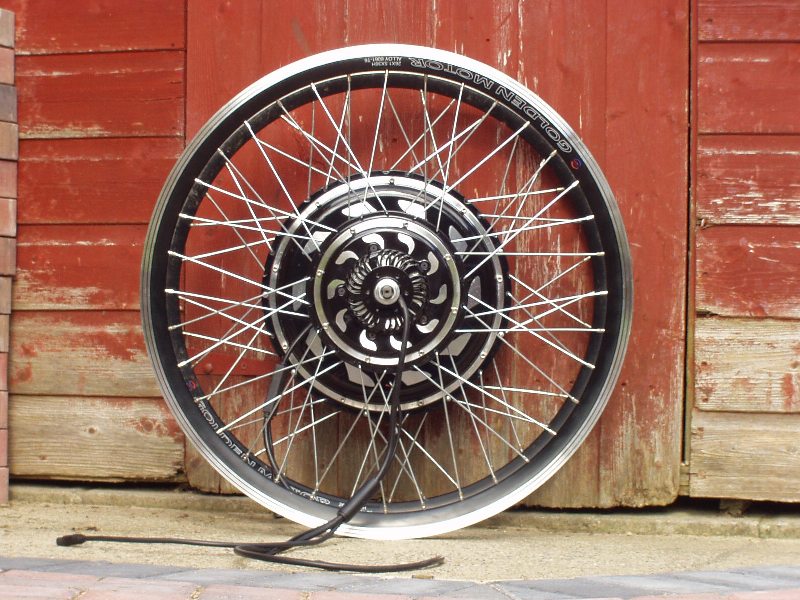
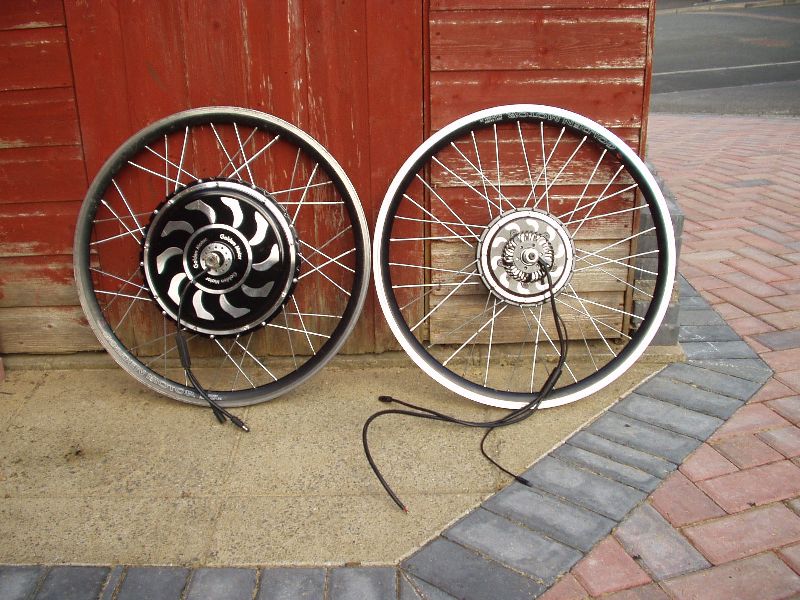
I was also curious to see how much lighter it was than the Magic Pie, so I quickly grabbed my digital luggage scales and checked the weight:
The Smart Pie wheel weighed in at 6.42 kg
(14.15 lbs) in its delivered state
(no freewheel, tyre or inner tube), which is 28% less than my MPIII which weighs 8.92kg
(19.71lbs), and 15.75% less than my original Magic Pie which weighed 7.62kg
(16.8lbs) both of the Magic Pies are 26" rear wheels too.
InstallationThe installation did not go quite a smoothly as I had anticipated, as I encountered several problems along the way.
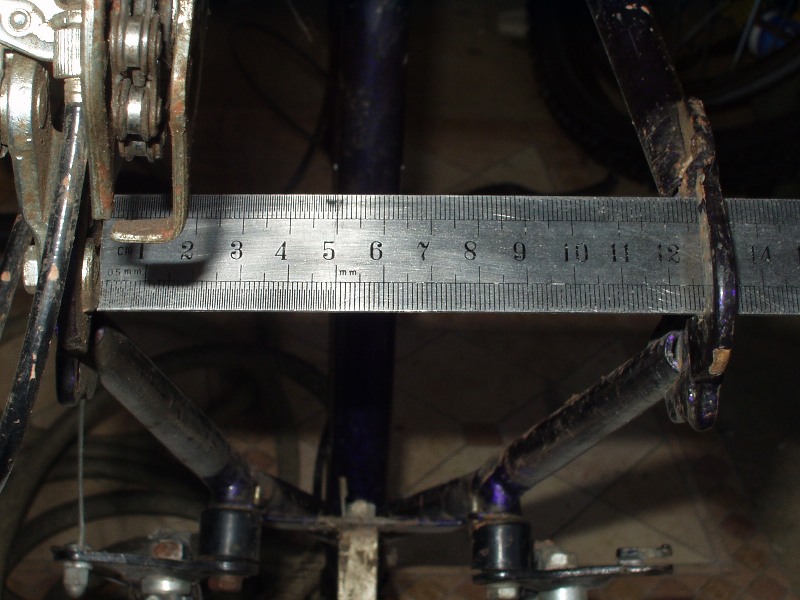
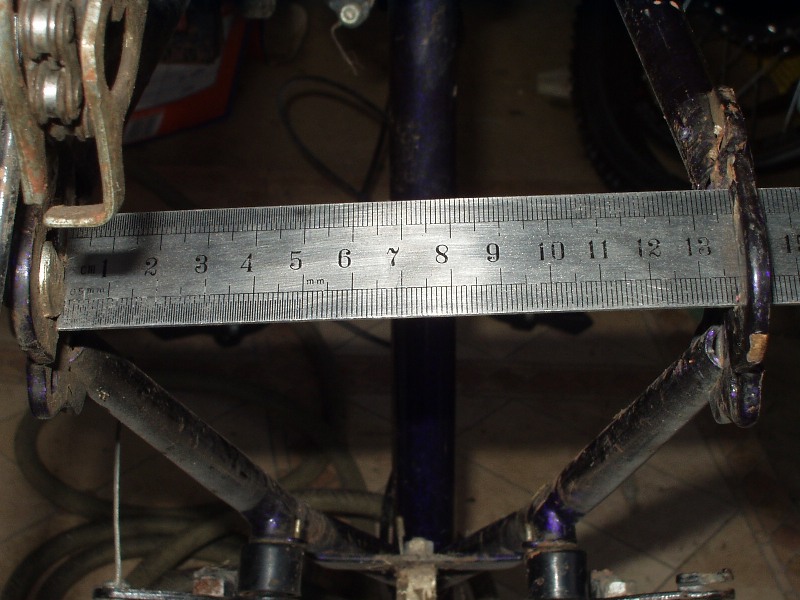
I fitted a new tyre and tube to the Smart Pie, and then flipped the bike upside down and removed the rear wheel. As I started to slip the wheel into place I quickly discovered the first problem; the dropout width was much too narrow for the hub to fit into, so I double checked the width with my trusty steel rule:
My ancient frame
(or to be more exact, the bike's frame) was only designed to accommodate a 5 speed freewheel mechanism, and therefore had a much narrower dropout than most typical modern frames.
This problem was quickly rectified after some gentle persuasion was applied with the assistance of a car scissor jack:
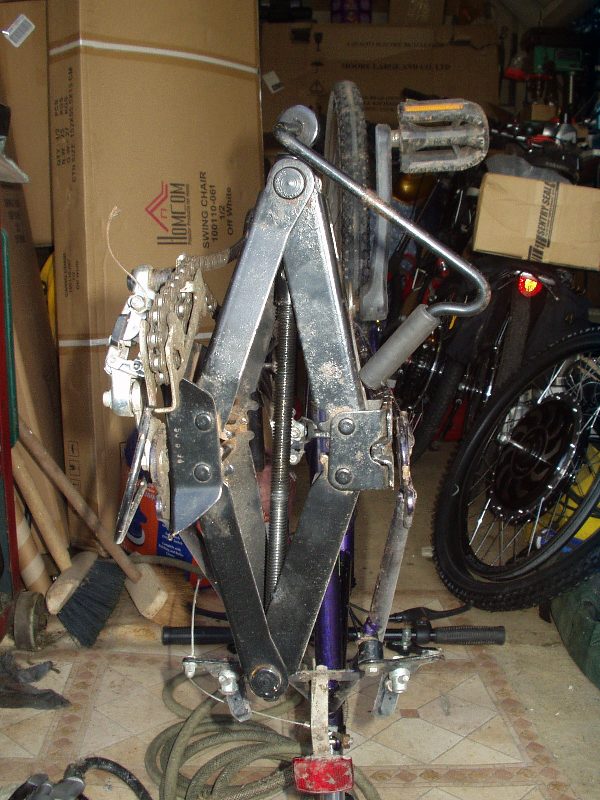
And here is the final result, the required 135mm wide dropout gap:
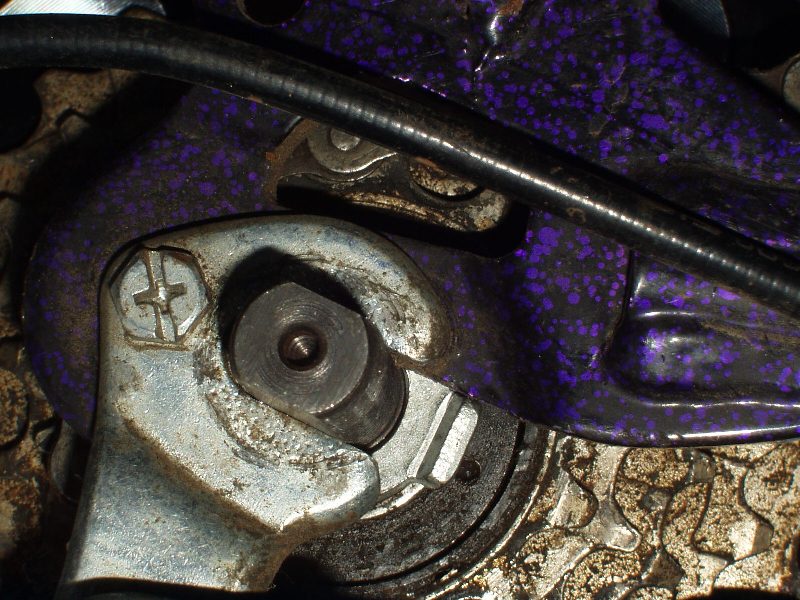
The second problem I encountered was caused by the derailleur mounting on the right hand side spacing the tabbed torque washer too far away from the frame for the tab to actually locate against anything, so I had to fit the washer on the inside of the frame instead, which still only locates against the top edge of the slot:
I also fitted the right hand tabbed washer on the inside, but I had to turn it 180 degrees so that the tab went into the slot before the axle, otherwise there would only have been only one surface for it to locate against:
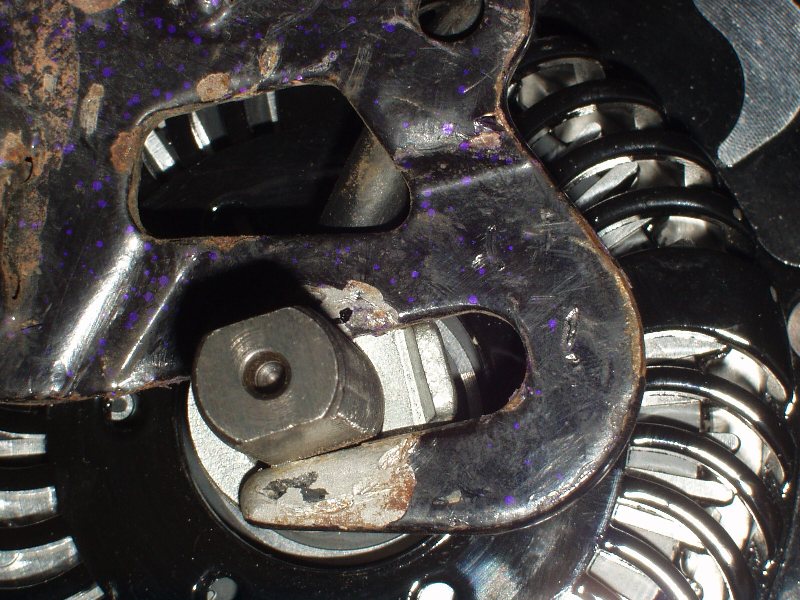
The tabbed washer on the right hand side is still unable to resist any torsional load on the axle from the regenerative braking, but at least both washers are able to resist the driving torque of the motor which is far greater.
The third problem that I encountered was with the freewheel gear cluster, as the machined surface that the freewheel screws against seems to be a bit too low in relation to the surface of the side cover for my particular freewheel:
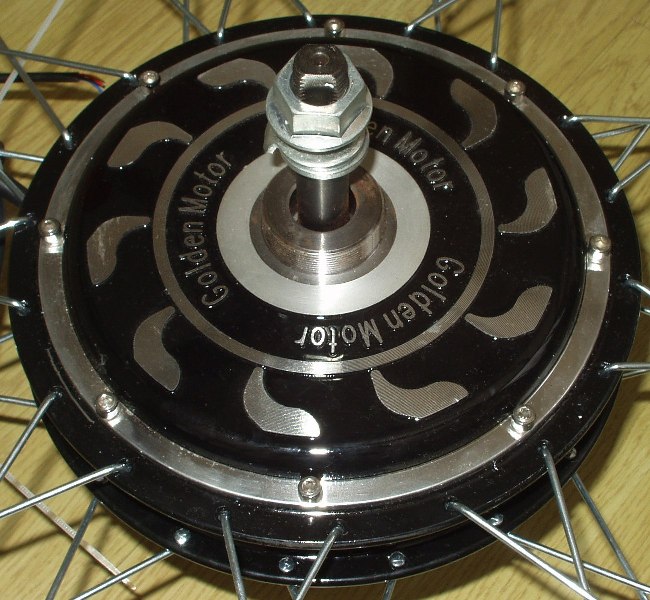
I tried both a 7 Speed and a 5 speed freewheel, and both of them needed the one provided spacer washer just to prevent the freewheels from binding against the hub cover:
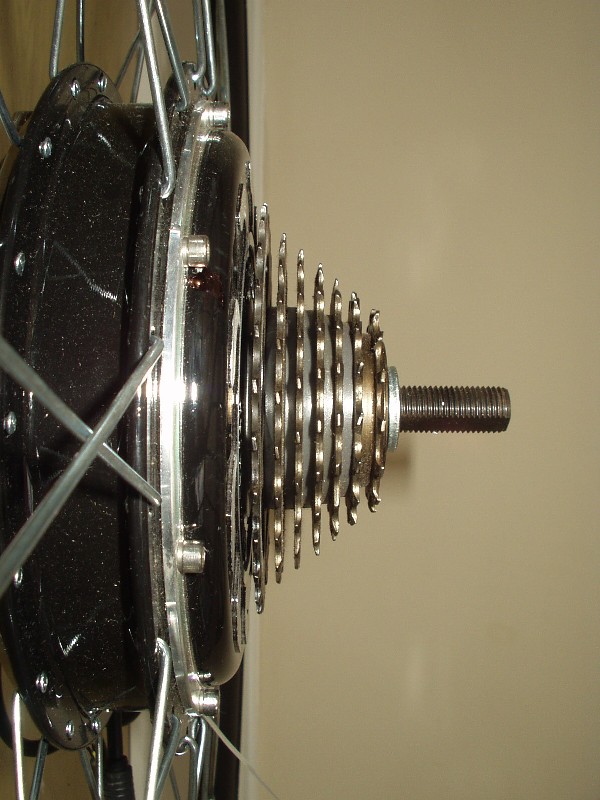
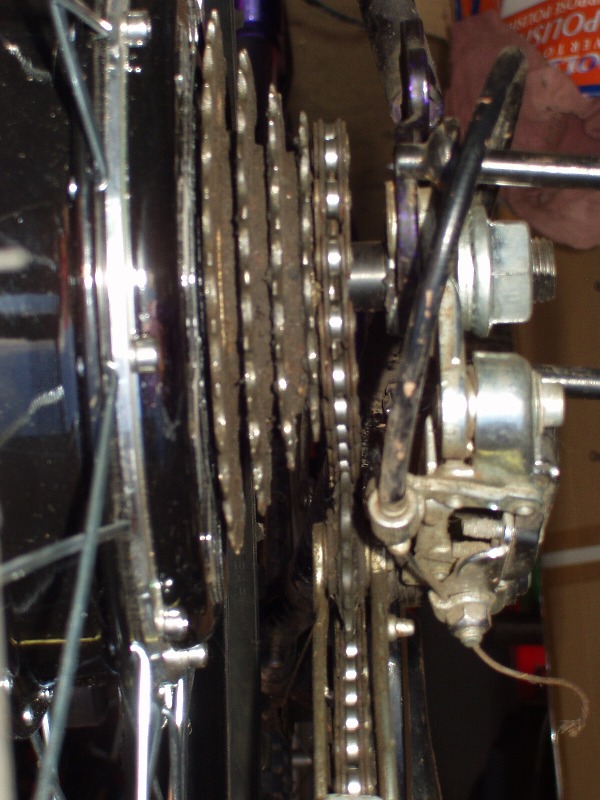
Even with the single spacer washer in place, I was unable to use 1st gear
(the largest sprocket) because the dérailleur mechanism was not able to move over far enough to change gear without hitting the hub cover:
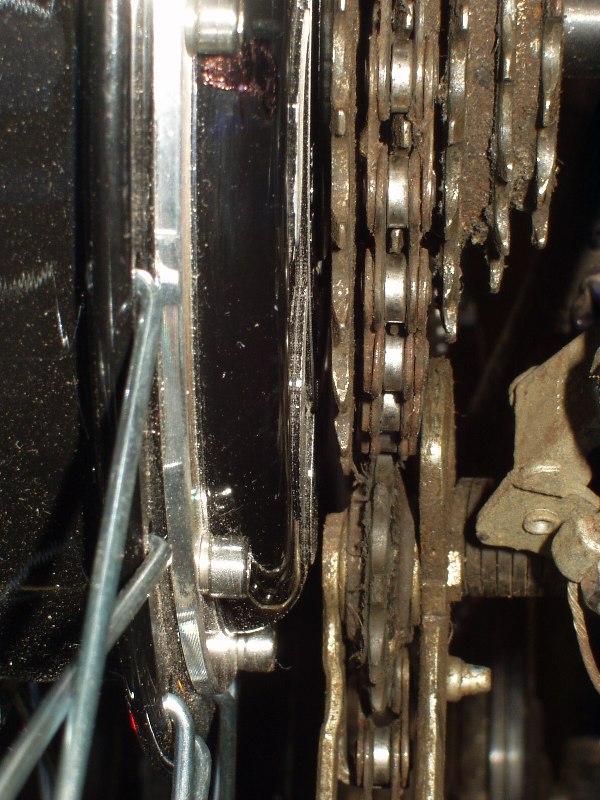
I haven't tried fitting a second washer to see if it would provide enough clearance to allow the correct dérailleur operation with my particular 5 speed freewheel, but I would be concerned about how much thread was left holding the freewheel onto the hub if too many washers needed to be fitted to produce sufficient clearance.
For the time being, I have simply adjusted the stop screw on my dérailleur so that 1st gear cannot be selected, and to be honest, I don't think I will even bother trying to make 1st gear usable as in all the years I've had this bike, I've never needed to use the smallest chainwheel on the front.
With the motor fitted, I flipped the bike upright again and started on the controls. I pulled the rubber grips off and swapped the brake levers for the new ones in the kit.
As I was about to fit the twist throttle assembly, I suddenly remembered how inconvenient I had found the additional width of the handlebars on my other bike to be when squeezing through narrow doorways etc.. So I decided to take some drastic action and hacksawed ~30mm off each end of the handlebars to compensate for the additional length of the chromed plastic end caps on the grips which extend well beyond the end of the handlebars:
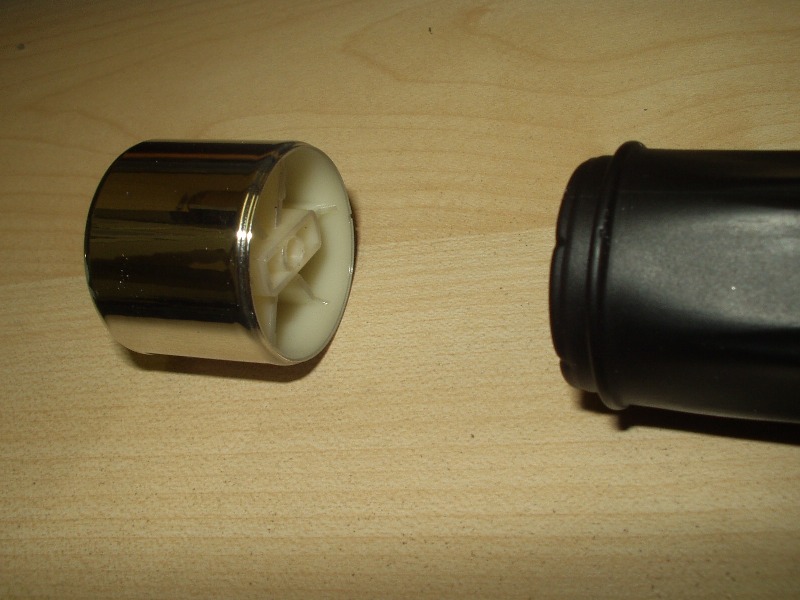
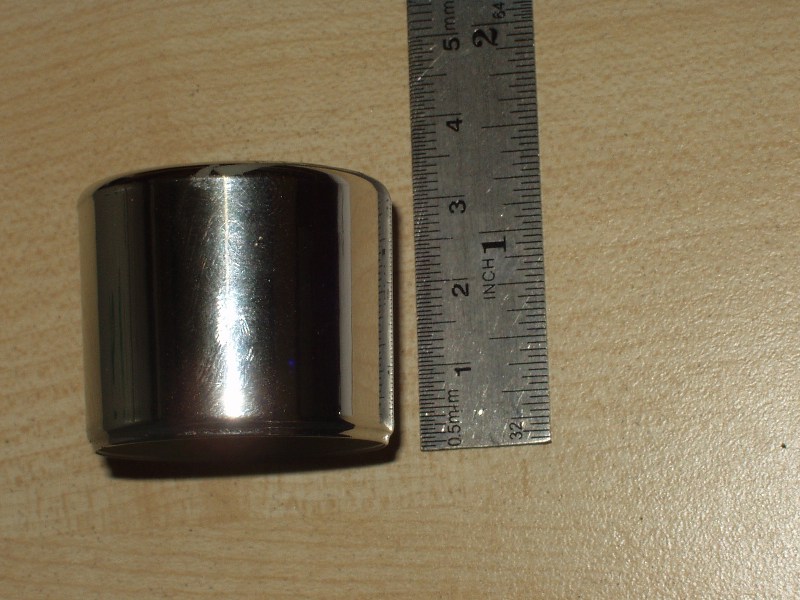
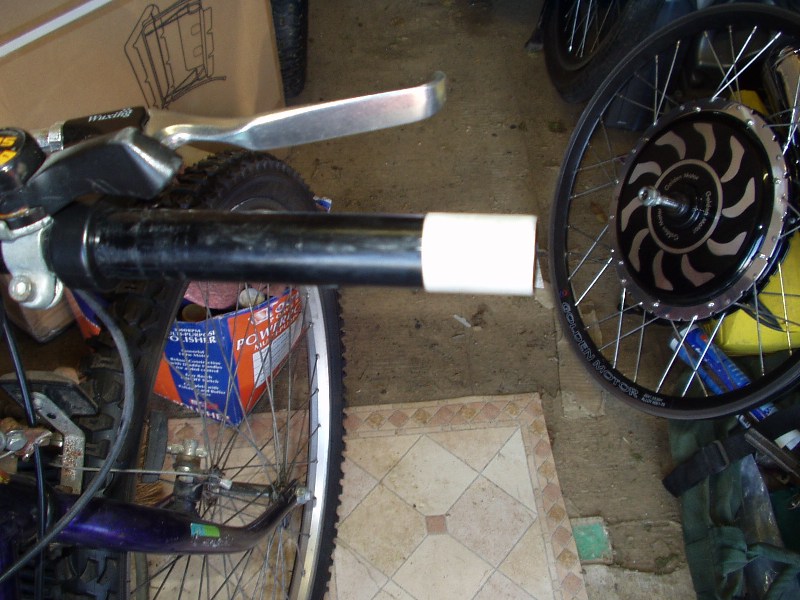
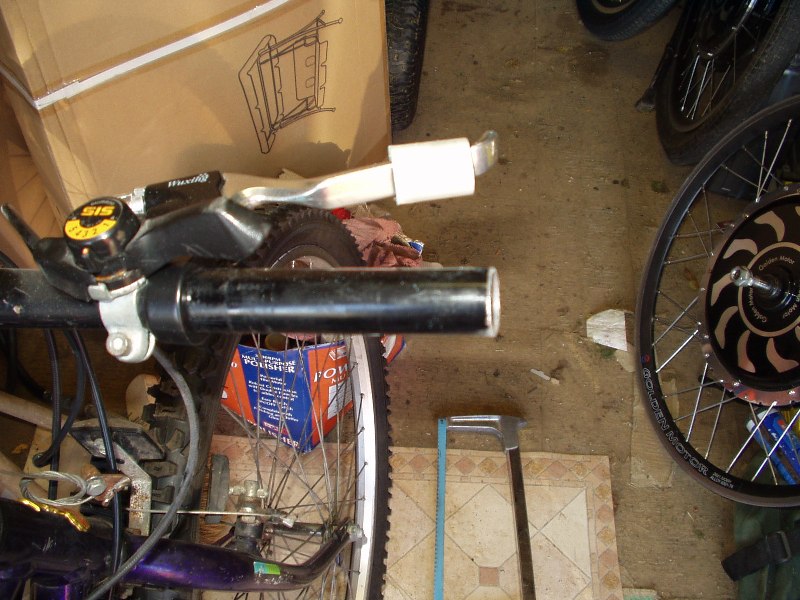
The controls were quickly fitted and tightened in the correct position, and the width of the handlebars seems much better than my other bike fitted with an identical twist throttle, and I still have the option of reducing the overall width of the handlebars even more by simply removing the plastic end pieces if necessary.
The controls were plugged into the front harness which was then taped to the frame using insulation taped along its route to the connector on the motor harness.
I soldered a suitable connector onto the power cable to suit my home-made 1.4 kg
(3.09 lbs) battery pack, a 29.6V 5Ah Turnigy LiPo pack
(2 x 4s) which is contained within a small frame pannier bag strapped to the front of the top crossbar.
I then secured the rest of the motor harness to the frame using a bit more insulation tape, and here is the final result:
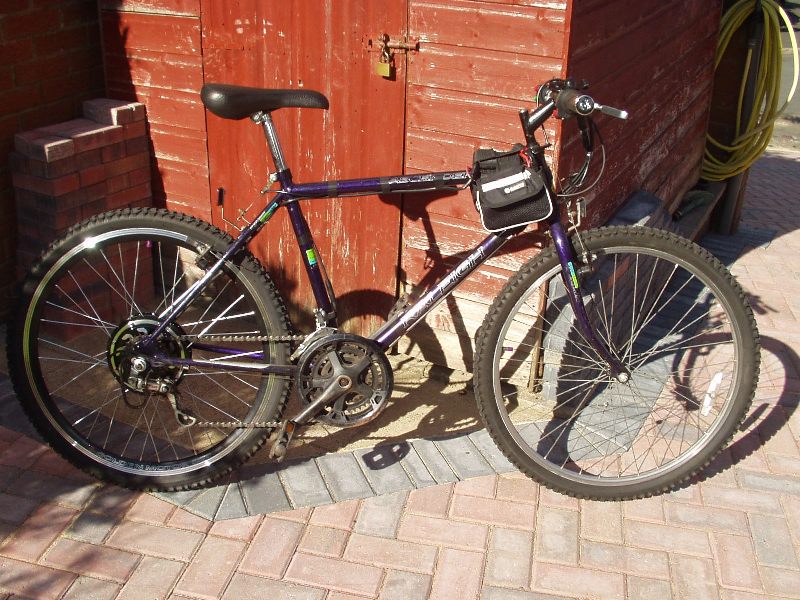
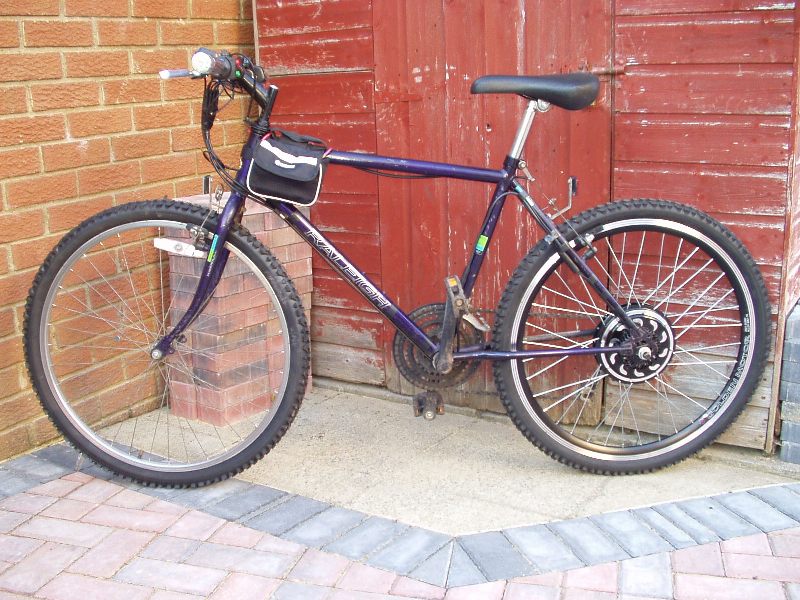
For those who may be wondering, the total weight of the converted bike
(including motor and battery pack etc) is now 22.72 kg
(50.09 lbs).
Test Pilot's Weight: 66.7 kg
(147 lbs or 10 st 7 lbs)Battery Pack: 29.6V 5Ah Turnigy 20C LiPo pack
Total Weight: bike + motor + battery pack + test pilot = 89.4 kg
(197.09 lbs)You can see from the following pictures exactly how neat and unobtrusive the Smart Pie is:
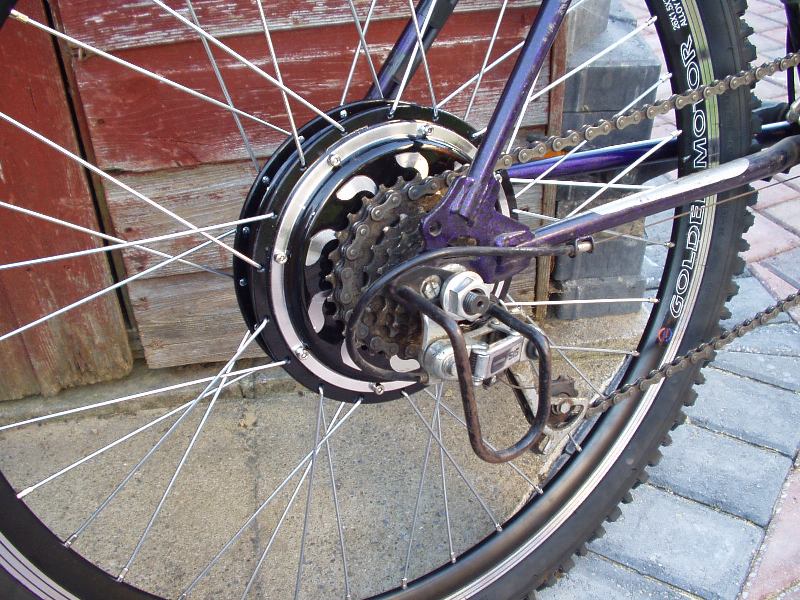
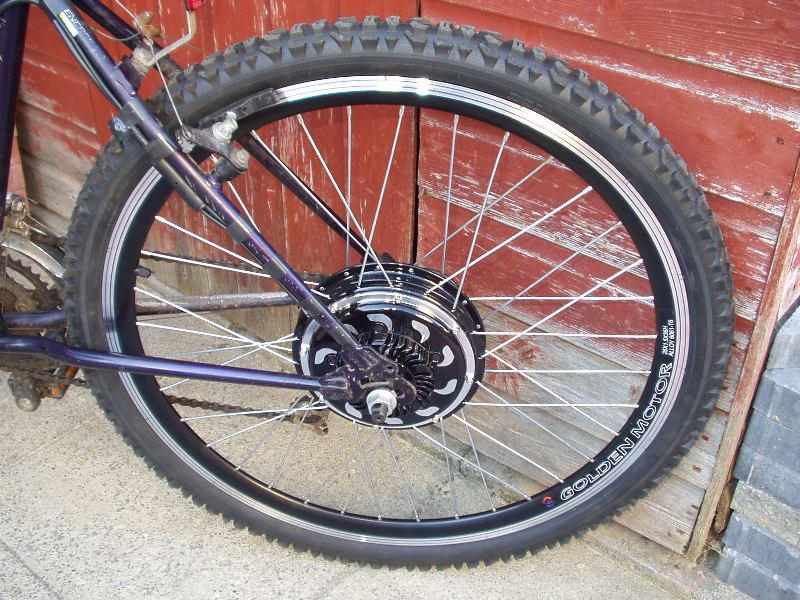 So what's it like to ride?
The first thing I noticed was how easily it free-wheeled downhill, and also how much easier it was to pedal at speed without motor assistance, compared to the Magic Pie.
I can honestly say that I was not really aware of any discernible drag from the motor at all, whereas the drag on the Magic Pie is very noticeable above 10mph or so.
I then tried the throttle to see what this little motor was like under power, and I was pleasantly surprised at the relatively low noise level, along with the amount of torque being delivered by such a small direct drive motor.
Although it's pretty quiet, the motor is not silent, as it produces a sort of rumbling noise at slow speed when accelerating hard or climbing hills. At higher speed, the sound of the motor is barely noticeable while pedalling, and if you stop pedalling, the noise from the freewheel's ratchet mechanism instantly overshadows it.
I was eager to see how powerful this motor was, so I decided to reprogram the controller for maximum Amps, to see how much difference it would make to the performance.
I noticed the additional assistance straight away, which was also accompanied by a much harsher "growling" noise when the motor was working hard at slow speed, but this noise soon diminished as the speed began to rise.
Even when set at 100%, the Smart Pie's regenerative braking is nowhere near as effective as the larger Magic Pies, and I soon noticed that I was having to use the mechanical brakes in addition to the regen for the majority of my braking, which I seldom have to do with the Magic Pie's much more powerful regen.
On the flat, the top speed of the Smart Pie seems to be pretty much the same as the Magic Pie, but uphill it is noticeably slower, which is only to be expected with the reduced power.
As I've become accustomed to the extra power from my 60Amp modified Magic Pie, I wanted an unbiased opinion on the motor's performance, so I asked my wife to take it for a spin. At first she simply refused to ride it, because she's never ridden an electric bike before as she considers it to be cheating, but eventually I was able to talk her into it and she agreed to give it a go "just down the road and back".
I watched her ride down to the end of the road and then disappear around the corner out of sight. When she eventually returned about 10-15 minutes later, she said she had "just been testing it along the bridal path, past the shops and up the steep hill back", I could tell she was quite impressed and had enjoyed her test ride, although she was obviously not prepared to openly admit it.
Later in the day she asked if she could borrow my bike to take the dog for a walk because she was running out of time and thought it might be quicker. She returned about half an hour later with a big smile on her face and proceeded to inform me of how far she had been, and also that it was the first time ever that she had been able to ride up the path through the woods at the back without having to get off and walk.
I need to be a bit careful about what I'm trying to convey here, but suffice to say that my unbiased tester is perhaps not quite as lightweight as myself. So I would say that the Smart Pie certainly does make a big difference for such a small motor.
Power ConsumptionHere are the results recorded on my watt meter during some of my test rides:
Controller factory set to 15 Amps continuous 45 Amps max
Maximum current: 17.74 Amps
Minimum Voltage: 30.16 Volts
Maximum Power: 546.8 Watts
Maximum Speed: Not Measured
Controller reprogrammed to 30 Amps continuous 70 Amps max
Maximum current: 33.15 Amps
Minimum Voltage: 31.83 Volts
Maximum Power: 1055.1 Watts
Maximum Speed: 18.1 mph
(measured with my phone's GPS)Also tested on 51.8V 14 cell 5Ah LiPo pack weighing 2.06 kg
(4.54 lbs) Maximum current: 31.72 Amps
Minimum Voltage: 51.98 Volts
Maximum Power: 1648.8 Watts
Maximum Speed: 25.3mph
(measured with my phone's GPS)ConclusionThe Smart Pie does exactly what it is supposed to do, and produces a reasonable amount of torque which may need to be supplemented with a bit of pedal assistance if necessary. However, don't expect it to climb steep inclines unassisted, as the diminutive Smart Pie will definitely struggle on its own.
If you enjoy riding your bike, but you are beginning to want
(or even need) a bit of assistance on hills, then the Smart Pie should be perfect for your needs, but if you need to climb steep hills and are not able
(or prepared) to do a bit of pedalling to assist the motor, then I would strongly advise you to go with a Magic Pie instead.
Possible improvementsI think that connectors need to be a pre fitted for the pedelec and reverse function on the motor harness, rather than simply leaving the four wires sticking out, and also for the horn and light connections on the front harness.
I think that the kit would be much better if it were supplied with
all connectors pre fitted, and supplied with matching pre wired plugs that could then be connected by the owner to suit his/her individual requirements.
This would make the installation much neater, and it would also be much easier to quickly disconnect the wiring when wheel removal was required for changing tyres or mending punctures etc.
I also think that GM should sell compatible LED headlamps with an integrated horn unit, which could be pre fitted with matching connectors so it could simply plug straight into the harness in seconds, without having to make any fiddly connections and possibly getting the wires mixed up by mistake too.
So why is it called SMART PIE?
Because it is an anagram of PRIMATES? Maybe, but probably not, I'd like to think it's just an acronym for
Small
Motor
Applies
Remarkable
Torque and
Plugs
In
Easily, but I suppose it's like I said earlier, it's SMART because it looks SMART.
 Alan
Alan