Hi, I have decided to share my experience with the new SmartPie together with the new Cycle Analyst V3 (CAV3) and Thun Torque Sensor. Even though I have only owned the SmartPie for two weeks I think I have enough experience to write a small review that may help others. There is only one other review here at the moment so one more can't hurt.
I’ll start with the build and do the reviewing at the end.
I have skipped a lot of small steps so this is no instruction manual.
Let’s start with the unpacking of the SmartPie:
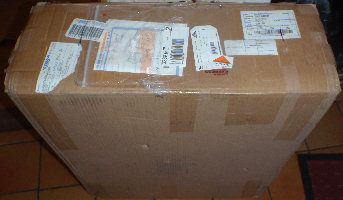
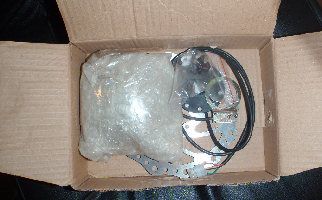
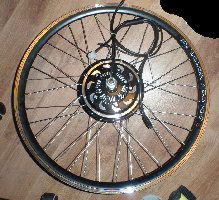
First open box contains 7-speed freewheel, PAS sensor and the disc break with bolts.
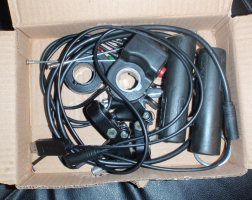
Second open box contains the thumb throttle, cruise speed controller, break leavers, grips and the USB cable.
And the CAV3:

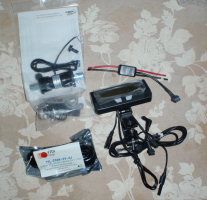
Included was the CAV3 unit, a 1mohm shunt resistor, the torque sensor, a torque arm and a USB connector.
I’ll skip the battery unpacking. The battery is a 36V 10Ah LiFePO4 battery with a maximum of 15A continues power bought from somewhere else.
Mounting everything was not hard, but it took a few hours and it is not plug and play.
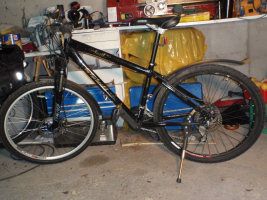
This is my bike before converting it.
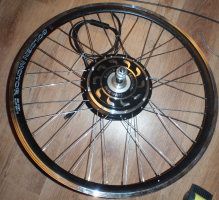
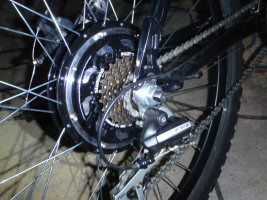
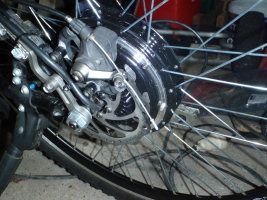
First I installed the 7-speed freewheel with the supplied washer to get some clearance from the motor cover then I removed the back wheel and installed the SmartPie wheel. The SmartPie fitted perfectly in my 135mm frame. Only some adjusting of the disc break was needed. I decided to test the motor now before going any further. Connecting up the SmartPie with the supplied controls was pure plug and play and could be done by anyone. Connecting up the battery with the CAV3 resistor required some soldering though, but I’m guessing that with a GM battery and no Cycle Analyst its plug and play there too. The motor worked beautifully with regen and cruise control fully working. It’s time to continue building.
The new CAV3 features complete throttle control, while the old only used throttle overriding, so the next step was to cut the throttle cable and connect it to the CAV3.
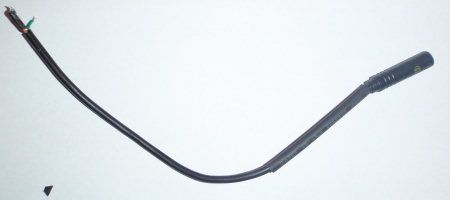
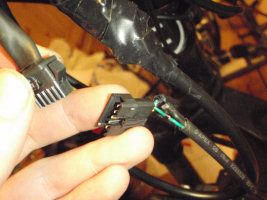
Since I don’t need the battery leds when using a cycle analyst the only cable needed is the green signal cable. +5V and ground isn’t needed. This green wire needs to connect to the green wire inside the 6 pin cable going from the CAV3 module to the shunt (CA-DP plug). Now the CAV3 has control of your throttle.
Now, unless you are going to use a torque sensor only setup you’ll need to connect a throttle to the CAV3. The throttle input on the CAV3 isn’t the same as used by GoldenMotor, but that’s fine since I just cut it off anyway. Connecting the throttle to the CAV3 is straight forward, just find the 5v, Gnd and throttle out that the throttle uses and connect them to the CAV3 throttle input (green=throttle, red=5v and black=ground). I didn’t use the supplied thumb throttle but a half twist throttle I purchased together with the battery. If you need the battery leds you can either connect the corresponding cables from the throttle input at the controller to the throttle bypassing the CAV3 or take the battery voltage from the output power jack on the CAV3. But I can’t see any reason why you would need the leds when you have the cycle analyst. Now you should be able to use the bike as normal but with the CAV3 able to take control from you if you go over one of its user selectable limits.
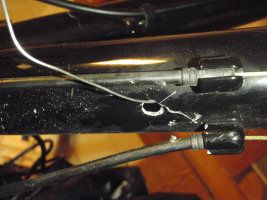
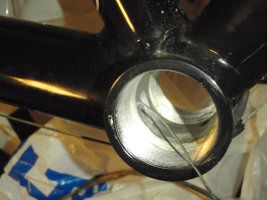
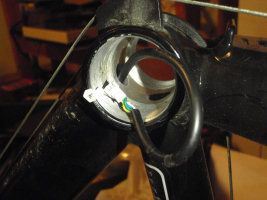
Now it’s time to install the Thun Torque Sensor. This is straight forward plug and play, but it does require you to drill a hole in the frame to get the cable from the Thun out of the frame. I decided to drill the hole right below the steering to keep the two very small connectors inside the frame and away from any water. This required some very frustrating cable feeding.
The last thing to mount was the break levers. I decided to connect those to the SmartPie controller instead of through the CAV3. The reason I choose this was because I can’t see any big benefit from the CAV3 controlling the breaking and by connecting them directly to the SmartPie I have a way of shutting down the motor if the CAV3 decides to freeze up with max throttle (the CAV3 is still in beta so it might happen).
The break levers on my bike are the kind that is combined with the gear selector so I decided to just cut of the levers with my dremel tool and install the new ones next to it. This worked out looking much better than I feared.
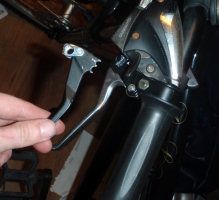
Now it was just a matter of cleaning up the cables, installing the battery rack and adjusting the gearing (going from 24 speeds to 21 speeds).
I haven't had a chance to get a picture of the whole bike yet, but I'll try to get one later.
Review:
I chose the SmartPie because it was small, lightweight and it was said to be quiet and have good freewheeling capabilities. It is also legal to use in Europe if you use 36V battery. After testing the motor I’ll have to agree with what I’ve read. It freewheels pretty good, although not as good as the original wheel, and it isn’t loud, but it does get louder when you pass 500watts.
These first two weeks of owning the SmartPie I haven’t put any speed restriction on it and have had the throttle connected, so it’s not in a legal state right now. With what I would call normal mild pedaling (helping the motor without breaking a sweat) I get an average speed of 25kph and a top speed of 41kph. I haven’t tried the top speed without pedaling, but I don’t think you’ll get more than 30kph before the motor stops being of any use. During the testing I have found that the motor uses about 350 watts to maintain full speed on the flats (there isn’t actually any flat stretches of tarmac close to me so this is based on an average of slight uphill and downhill). Max amp usage is around 17Amps (~660watts) but this might be limited by the battery (the controller is set to max 30A).
Very light pedaling gives me 35km range. Pedaling with the torque sensor only (no throttle, 500 mA/Nm) I get 50km range with my 36V 10Ah battery (there’s lots of small hills here, but no big climbs).
The SmartPie gives very good help up hills and I can maintain about 20kph even on very steep climbs (a very steep and long climb might get you sweating at that speed). Without pedaling the SmartPie is easily defeated by the hills here, but you don't have to help it much to keep it going.
Two negative things I feel needs pointing out. First off there is no instructions or documentation at all with the kit. You need to check the Internet for any information you might need. This wasn't a problem for me since I did a lot of research on the Internet before I received the motor, but I am sure a lot of people need it. Secondly the motor wasn't perfectly true and wobbles just short of 1mm at the edge of the motor. There is no wobble at the rim so I think they did a good job truing the rim, but the wobble at the motor meant I had to bend the break disc just a fraction so it don't rub. I can see and feel the wobble so I know it wasn't just the break disc. The wobble is noticeably at higher speed, but not a problem. I have found problems like this to be expected when buying from China, but the price more than makes up for it.
Conclusion: The SmartPie makes a lot of sense together with the Thun torque sensor, but is too weak to use without pedaling (unless you live somewhere flat). If you want to keep it legal the EU regulation only says the motor need to be rated <250watts output and even though the SmartPie is drawing 350+ watts from a 36V battery it is rated 250 watts output and therefore legal. I haven’t seen a better choice for an EU legal direct drive motor yet. One thing that would ease up my installation would be a CA-DP plug on the controller.
For anyone unfamiliar with the torque sensor: The Thun torque sensor is a torque sensing spindle where you use your own pedals and gear ring (I use a 3 speed gearing on mine totaling 21 gears). As far as I understand it uses a strain sensor that senses how much weight you put on the pedal and together with the 8 pole built in candela sensor the CAV3 is able to calculate how many watts you are inputting and can regulate the motor current from that. This makes it possible to ride the bike very slowly in low gears and have the motor helping you with only about 50 to 70 watts and if you start pedaling harder it will give you more. In essence it makes you in total control of the power going to the motor by just pedaling as would normally, pure genius. I’m sorry if I made it sound like a new revolutionary technology just there, but it is just a DIY way of getting what many commensal e-bikes already have.