Author Topic: SmartPie bearing play  (Read 16139 times)

Offline MAGICPIE3FOCUSPOWER

  • Confirmed
  • Master of Magic
  • *****
  • Posts: 372
Re: SmartPie bearing play
« Reply #15 on: January 19, 2013, 06:54:04 PM »
Which bearing did you order?
The big one?

Offline Lollandster

  • Confirmed
  • Bachelor of Magic
  • ****
  • Posts: 186
  • Norway
Re: SmartPie bearing play
« Reply #16 on: January 19, 2013, 07:14:06 PM »
Both
Disclaimer: I know nothing.
My ebike Build blog

Offline MAGICPIE3FOCUSPOWER

  • Confirmed
  • Master of Magic
  • *****
  • Posts: 372
Re: SmartPie bearing play
« Reply #17 on: January 20, 2013, 09:55:55 AM »
How did get the big one out?
Also human power and hammer?

Offline Lollandster

  • Confirmed
  • Bachelor of Magic
  • ****
  • Posts: 186
  • Norway
Re: SmartPie bearing play
« Reply #18 on: January 20, 2013, 12:20:30 PM »
Yes. On the small one I actually used a M18 threaded bar about one meter long to punch it out, that was heavy enough that I didn't need a hammer. On the big one I used a smaller non threaded rod that I hit with the hammer. On both bearings there is no way to get to the outer ring so the punching was done against the inner ring. Luckily it wasn't press fitted or the bearing might have split instead of releasing. The key is alternating blows so that the bearing doesn't get stuck.
Disclaimer: I know nothing.
My ebike Build blog

Offline MAGICPIE3FOCUSPOWER

  • Confirmed
  • Master of Magic
  • *****
  • Posts: 372
Re: SmartPie bearing play
« Reply #19 on: January 20, 2013, 12:49:31 PM »
Thanks.
I have to replace the Magic Pie 3 bearings, when they arrived :)

Offline dBlues

  • Confirmed
  • Junior Member
  • **
  • Posts: 34
Re: SmartPie bearing play
« Reply #20 on: January 21, 2013, 11:21:30 PM »
I took a look at the web, and in the US that 6812 bearing is available for about $25!

With the amount of play I saw in your video, there must be a ball missing in the assembly.  :)

I just cannot understand why GM keeps ruining their brilliant design work by using  such low quality components and workmanship.  They seem eager to keep screwing us to cut build cost by pennies, while not recognizing the huge dollar value a reputation for high quality brings.  Is it possible that  GM actually stands for Ghastly Management?  General Motors used to go by that moniker.  Come to think of it, they too had gorgeous designs compromised by horrible build quality.  I loved driving my Cadillac, but came to hate owning it because of all the build quality related problems. 

Good luck with your Pie rebuild.  Please keep us posted on your progress.

TTFN,
Dennis

Couldn't agree more.

Good work guys with this problem.

Need to replace my bearings too...
« Last Edit: January 21, 2013, 11:56:58 PM by dBlues »

Offline Lollandster

  • Confirmed
  • Bachelor of Magic
  • ****
  • Posts: 186
  • Norway
Re: SmartPie bearing play
« Reply #21 on: January 22, 2013, 06:44:59 PM »
I took some pictures during the bearing swap. I didn't post them before because uploading photos to this site is a pain in the ass. But here they are:


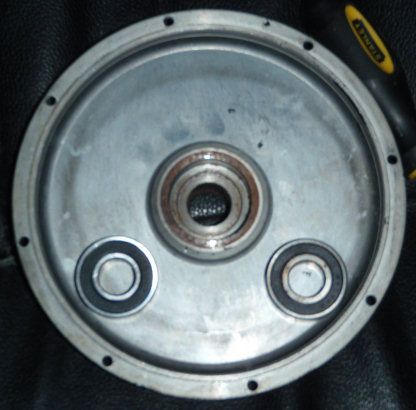
This is the small bearing. 6202 2RS. New one is on the left. I took this one out without removing the gear freewheel because I couldn't find the tool for it. It went ok with the help of a steel bar that I had.


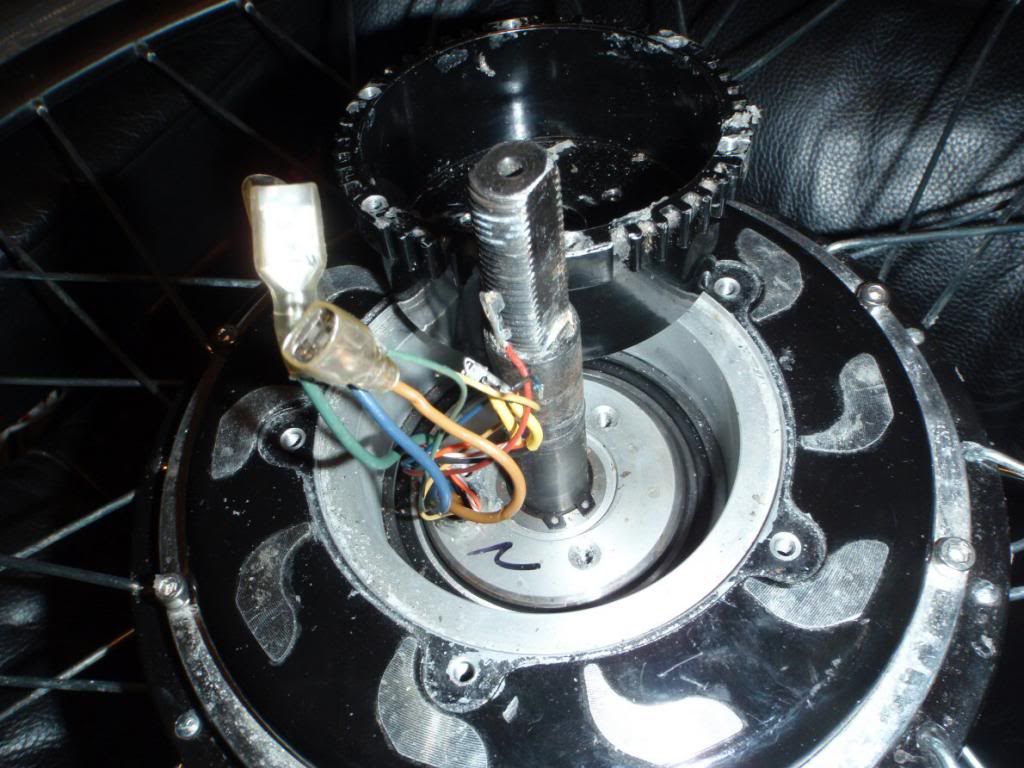
This is to show the location of the big bearing. 6812 2RS. As you can see you need to remove the controller cup and to do that you might need to cut the hall sensor plug. I don't know if the original one fits trough the hole, but my modified one didn't (6pin JST-SM).


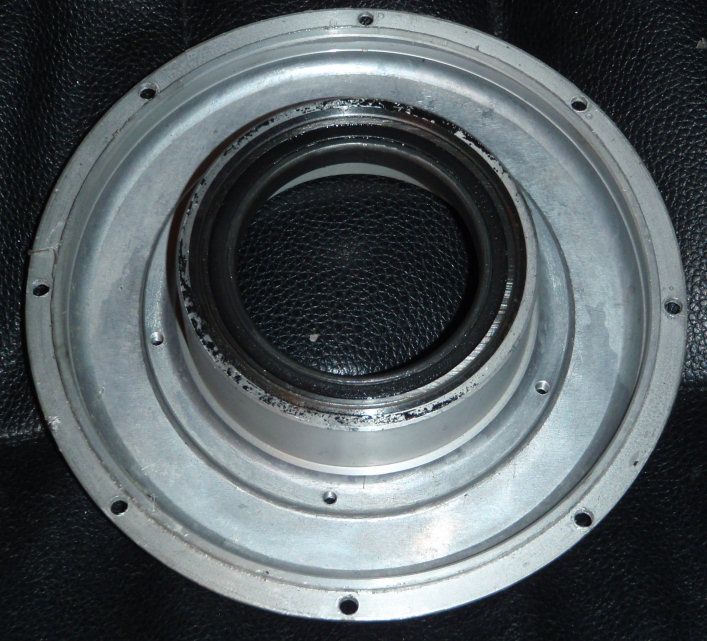
To punch out the bearing you either need to remove the side cover, remove the stator or do as I did and remove both. The stator is held in place by the big bearing so it is probably best to remove the stator before taking the cover off so it doesn't damage the magnets. And if you need to punch the bearing out somewhere with metal shavings around you don't want to bring the magnet ring.


This picture clearly shows which way you need to punch it out, but if you couldn't figure that out yourself you might not want to start on this in the first place.


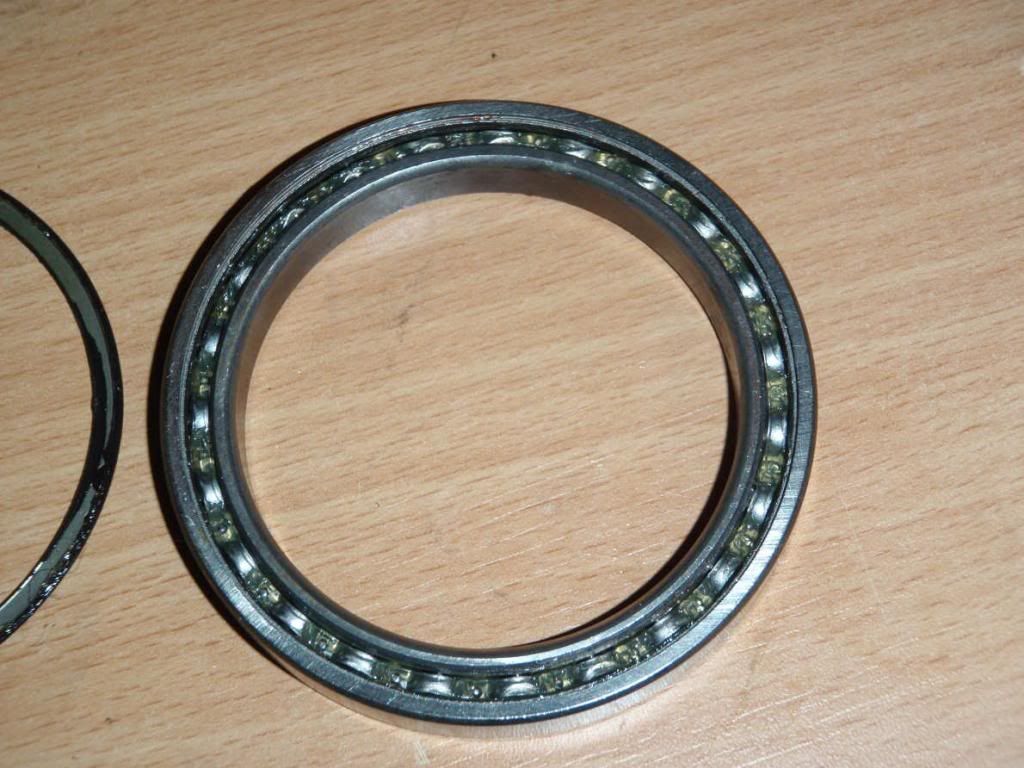
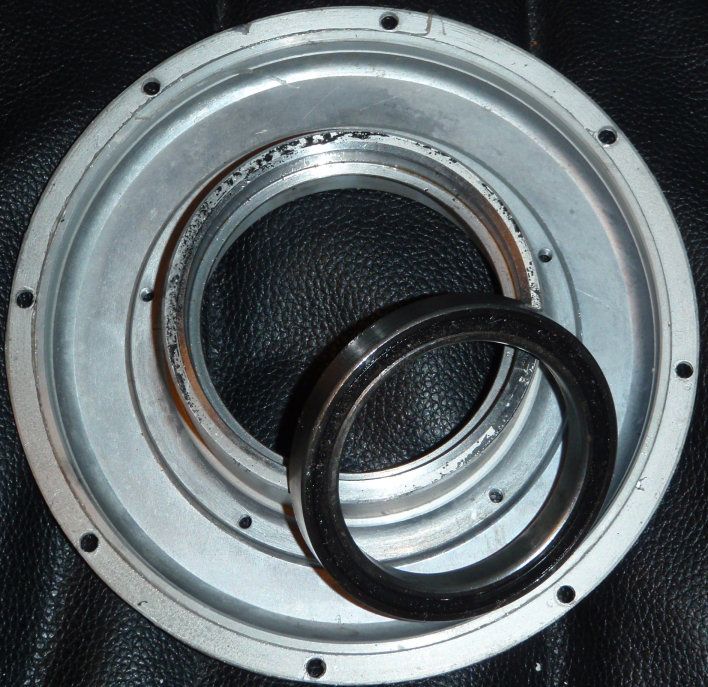
This is the old bearing with the rubber sealing removed to show that the bearing is in good condition.

Next time I buy a hub motor I'll probably look for one that has the cables exiting through the axle. That way I know new bearings are small and cheap and that they are placed far away from each others. But even then I guess there is no guarantees, the axle might break instead.
Disclaimer: I know nothing.
My ebike Build blog

Offline MAGICPIE3FOCUSPOWER

  • Confirmed
  • Master of Magic
  • *****
  • Posts: 372
Re: SmartPie bearing play
« Reply #22 on: January 22, 2013, 09:35:28 PM »
Thanks for sharing your info.
O well I don't have a Smart Pie, but still nice to know!

Offline Bernielah

  • Confirmed
  • New Member
  • *
  • Posts: 2
Re: SmartPie bearing play
« Reply #23 on: July 30, 2013, 10:41:52 PM »
Just received a SmartPie rear kit and am installing in a full suspension Giant bike. I also am a bit disturbed by the play in the bearings, amounting to about 2mm of sideways free play at the rim.
What have been the causes so far? Is it actually a failing bearing, or badly matched housings or shaft?  Not sure whether to dismantle at this stage, have been advised to just use it but my "mechanical conscience" will be nagging me ::)   Don't like the idea of side preloading on this bearing design, it will wear out very fast.

Offline Bernielah

  • Confirmed
  • New Member
  • *
  • Posts: 2
Re: SmartPie bearing play
« Reply #24 on: September 04, 2013, 12:38:33 AM »
Sooo, I took it apart and found considerable clearance between the large bearing outer race and the housing. Added Loctite Bearing Fit and all is well.  Still very marginal play in the wheel, but it's now only the internal clearance in the bearings, and because they are so close together.  While it was apart I noticed that the cable from the windings going to the controller, was dislodged from the glue at the exit hole, and had worn through to a conductor. Reglued and reassembled carefully.
Took it for a short test run and it's running beautifully. Smooth and quiet on 36v. Expecting great things on 48!
Quality Control gets a fail, but if you're handy and persevere, it's a very nice unit.